iPads and iPhones have very useful 'Speak Selection' and 'Speak Screen' facilities built into the operating system. If you want to have text read back from a web page, a document, a note in the Notes app or an e-Book, you can use these built-in features without the need to buy a special app for this.
For a one-time activation of Speak Selection and Speak Screen on an iPad using OS13:
The actual number of voices will vary depending on the iPad / iPhone you are using and its operating system. If you don't like the default voice, try something else. The English (Ireland) voice, Moira is a popular one. You can also adjust the speed of the voice by adjusting the Speaking Rate.


First of all, you have to select the text you want read out, which can be a little tricky until you get used to it.

If you want to select all of the text, which you would probably want to do, tap on a word, hold it for a second, then release to get an option to select all of the text. If you chose Select All, you will then have an option to Speak the text.

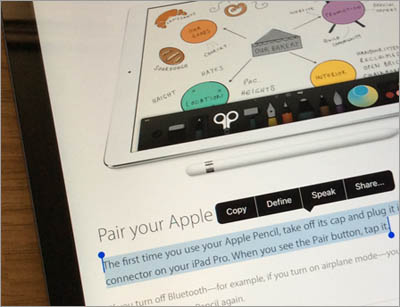
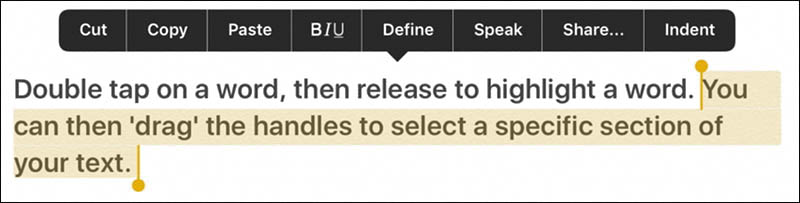
If you only want to select a short piece of text, for example a paragraph on a web site, double-tap on a word, then release to highlight it. You can then 'drag' the handles to select a specific section of the text.
Once you have selected the text you will have an option to read it out, using your preferred voice. If you don't get any sound, make sure you have the volume control on your iPad / iPhone turned up!
Speak Screen is particularly useful as a tool for reading eBooks and long paragraphs of text. Note that it doesn't highlight each word as it is spoken. In most apps, e.g. the Kindle app, Speak Screen will automatically move on to the next screen and carry on reading until you press the Stop Button.

It can be a little tricky to get started. Use a two-fingered flick down from the top of the screen. If you have a case that extends over the edge of the display, you may have to take the case off to get your fingers close enough to the edge for the two finger flick.
Speech Controller (switch on under Accessibility > Spoken Content) allows quick access to Speak Screen and negates the need for the two finger flick down from the top of the screen. If you expand the controller bar and press on the finger icon, you can tap or drag anywhere on the screen to hear the content under your finger.
You may prefer to use an app for reading text back, for example if you want to use a different voice, if you find it hard to control Speak Selection, or if you need additional reading support. Many apps, that include text reading (and other features) are available. These include: ClaroSpeak UK, NaturalReader, Speak It! and Voice Dream Reader.
Once a month we'll send you an email with news, research and thoughts, as well as training courses and free webinars you may wish to attend.
Our social media sites - YouTube, Twitter and Facebook