
 Newsletter: join thousands of other people
Once a month we'll send you an email with news, research and thoughts, as well as training courses and free webinars you may wish to attend.
Our websites:
Posted by Robert Stewart on the 3rd August, 2017
When we upgraded our eye gaze systems, we also required a mounting solution to accommodate them... that wouldn't break the bank. There are several commercial solutions out there but they're all very expensive. The solution required several key features.
It needed to be:
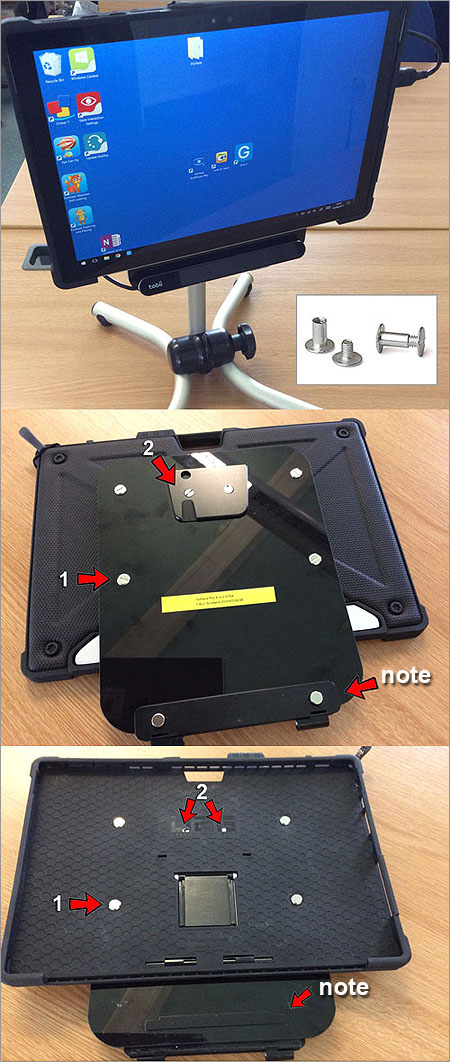
WARNING: Do not get Loctite 242 Threadlocker onto the Acrylic sheet as it causes 'stress cracking'.
NOTE: We've added 2 brackets to our system to accommodate 2 different types of eye gaze unit.
We managed to produce our bracket for around £40 but that's because we purchased the case via the 'Procurement Scotland Framework' (through XMA) for about £15.
Once a month we'll send you an email with news, research and thoughts, as well as training courses and free webinars you may wish to attend.
Our social media sites - YouTube, Twitter and Facebook