
 Newsletter: join thousands of other people
Once a month we'll send you an email with news, research and thoughts, as well as training courses and free webinars you may wish to attend.
Posted by Craig Mill on the 5th March, 2020

I have a pupil with a visual impairment. How do I share my computer screen or whiteboard to their iPad?
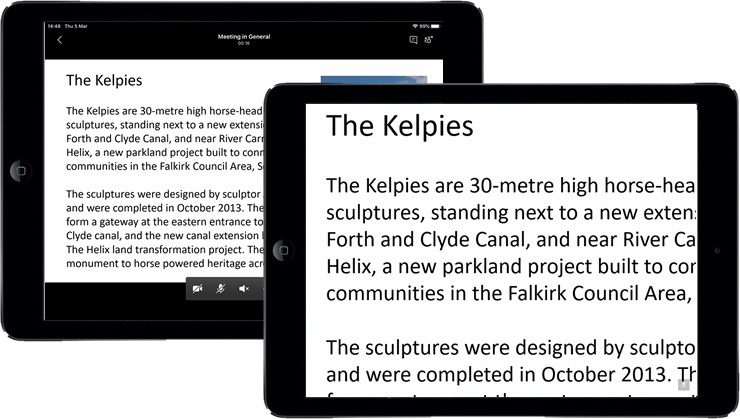
In this article, I will explain how to mirror or share content from a computer screen to an iPad using Microsoft Teams which is free and available to all schools in Scotland via Glow.
How to share information from a teacher's computer to a learners iPad is a question we are often asked at CALL. For a learner with a visual impairment, mirroring or sharing content from a teacher's computer and/or whiteboard to their device has many benefits, for example the learner;
Depending on the needs of the learner, mirroring or sharing information to a learner's device may eliminate the need to buy a video magnifier, which are often expensive and require the learner to assemble and disassemble the device, stand and camera, between classes.
Also, when a teacher is using a whiteboard to teach, either interactively or to highlight information on the board, there is a danger of the teacher blocking the view of the video magnifier.
Sharing or mirroring content from a whiteboard to an iPad requires the devices to communicate with each other, usually via an Internet or Wi-Fi connection between the teacher's computer/whiteboard and the learner's device. An interface, such as an app is usually required to 'pair' everything together.

There are numerous 'mirroring' or 'sharing' apps available and although most are free at the point of download, costs can be incurred over time.
Examples include:
At CALL we use Reflector for mirroring iPads to our desktop for presenting webinars. Rather than installing an app to the iPad, Reflector is installed on a laptop and we use the iPad's built-in 'Screen Mirroring' tool to couple the devices.
However, this has been problematic for us as the university has blocked certain 'media ports/firewalls' because of security concerns.
We have made some tweaks and workarounds to mirror our iPads, but many I.T.
Some local authorities have approved certain screen sharing apps that they allow through their firewall, although this often involves a great deal of negotiation between the teacher and I.T., and may take some time for the apps to be approved.
Also, teachers do not always have the necessary permissions to install software on devices due to them being managed and locked down. It may appear as if mirroring is a no-win situation!
Some dedicated magnification programs such as SuperNova have secure mirroring tools built in, e.g. Connect & View, however, this is only currently compatible with a Windows computer.
One option is to explore alternatives such as connecting devices with physical
This will eliminate security issues, but it can be a real faff with cables trailing around the classroom – the learner's freedom to sit where they choose is also restricted as is the device you can connect to, e.g.

In addition, wiring everything together could involve a great deal of fiddling with graphic cards, video 'send and receive' cables as well as a myriad of connectors etc.
Yes, I think there is an alternative, one that is secure, freely available to all schools in Scotland via Glow and is easy to set up – Microsoft Teams.

Here's how to do it. The first step is to set up Teams on the teacher's computer, then set up Teams on the learners iPad.
On the teacher's computer:
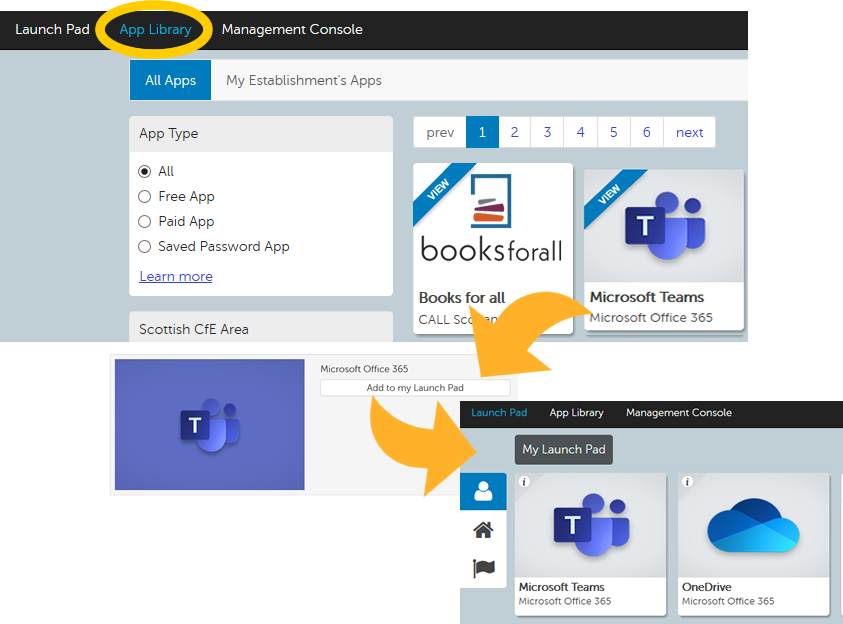

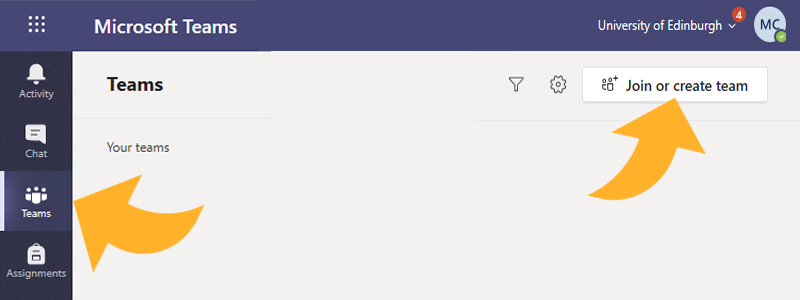
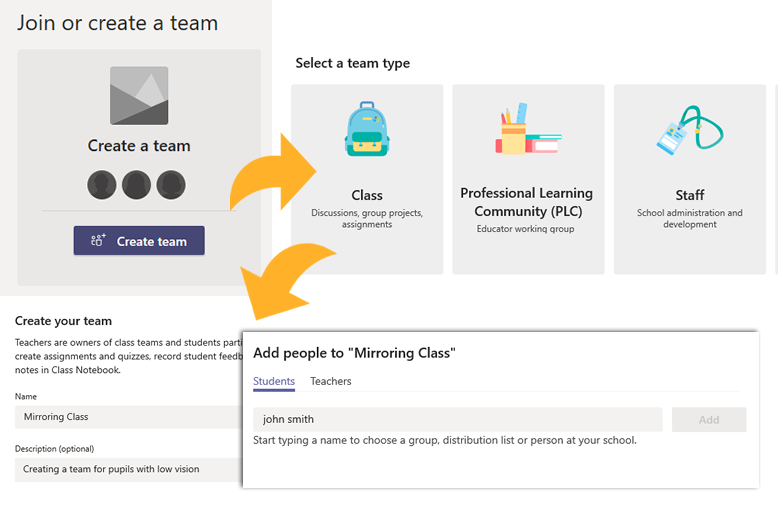
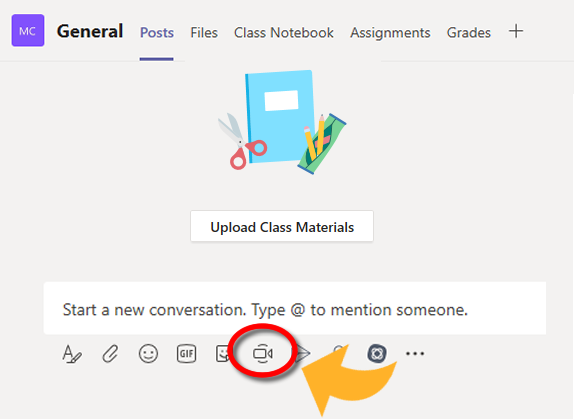
After completing this stage your Team is ready to go. Here you can upload and share class materials such as files or use the chat box to start discussions. But the most important feature for mirroring is the Video or 'Meet Now' icon at the bottom of the page, under the 'Conversation' box.

On the learner's iPad:

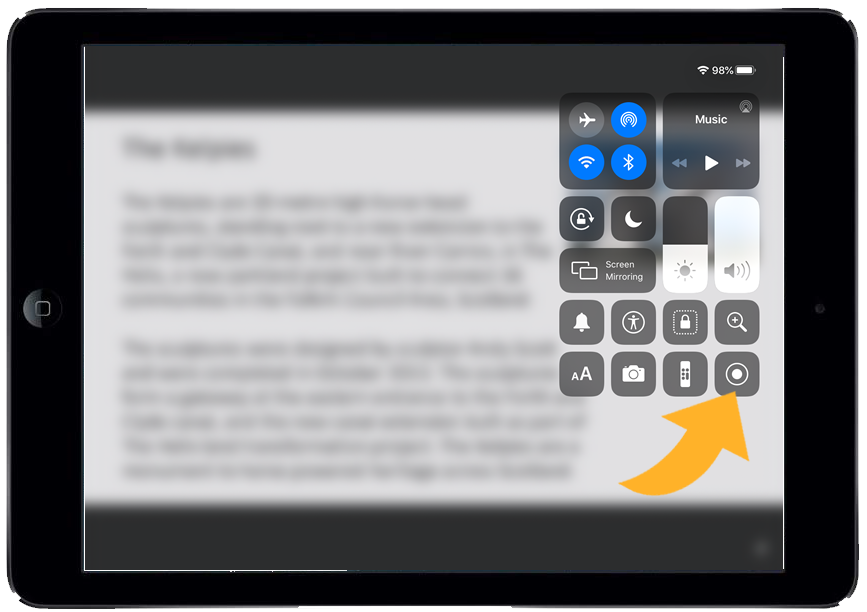
Finally, to end the Team session the teacher selects the 'end meeting' button on the right side of bottom strip.

Once a month we'll send you an email with news, research and thoughts, as well as training courses and free webinars you may wish to attend.
Our social media sites - YouTube, Twitter and Facebook