
 Newsletter: join thousands of other people
Once a month we'll send you an email with news, research and thoughts, as well as training courses and free webinars you may wish to attend.
Our websites:
Posted by Kirstin Barr on the 30th April, 2026
One of the things that we keep on thinking about with assistive technology is that it begins by identifying the barrier to learning rather than with the tool. Knowing what is causing barriers for your learner allows you to then look towards the tool to support them.
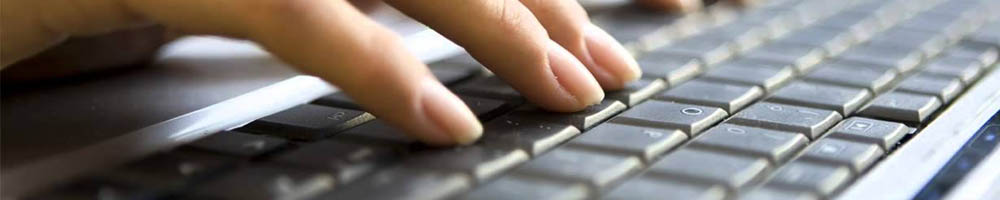
For one learner with cerebral palsy, working for the final few weeks before exams, they were finding typing very tiring, holding the hands above the keyboard and accidental key presses due to a degree of tremor all added up to really affect their ability to complete extended written tasks. They had been using a combination of typing and a live scribe to complete their exams in previous years but was there something that could support them to be more independent with this?
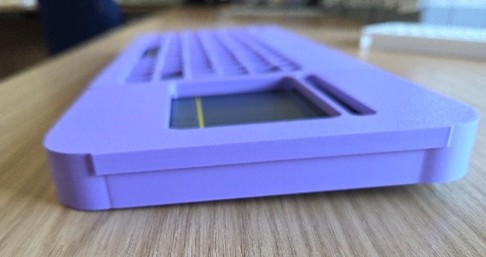
A keyguard, a physical overlay placed on top of the keyboard to isolate individual keys and allow for the hands to rest on the keyboard while typing, offered a potential solution. After trialling a few devices we identified that a key guard seemed to be of benefit and also which was the learners preferred keyboard to use.
However, this is where we came across a problem. There is no commercially available keyguard for that keyboard available.
This made it the ideal opportunity to explore a custom 3D printed solution.
The process of designing the keyguard seemed initially to be a very daunting one. How was I going to manage to get the correct layout? And what about the sizes of the keys? This seemed like it was going to be a huge amount of measuring. In this case I was lucky to be able to find an image of the keyboard layout online which I converted into an svg to import into Bambu studio. This was one of the biggest timesaving steps in the process. It meant the layout and spacing were already accurate, and I only needed to check the overall dimensions against the physical keyboard. An alternative to finding an image online is to take a photo of the keyboard from directly above and then using a tool you are comfortable with to overlay shapes. I have done this simply using a PowerPoint slide, overlaying shapes (set these to have no outline for ease later on) on the picture to produce the keys and then an overall shape for the keyboard, delete the initial photo, group all the shapes and right-click and save as a picture. This can then be converted into an svg in the same way. This gives a very simple base with clean shapes for the key openings.
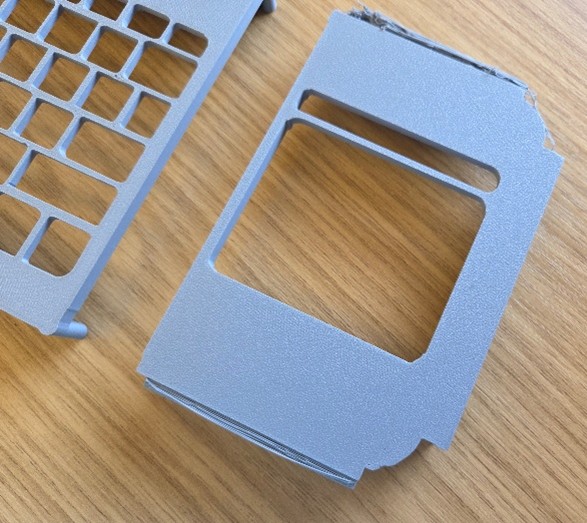
Importing this svg into Bambu studio the first step is to flip it over so that the top of the keyguard sits flat on the print plate. The total size of the keyguard here was too big for the print plate so I had to split it into two parts. Luckily this keyguard was for a keyboard with an attached trackpad so it gave the ideal location for the split. It is now time to split the object into parts and set the key spaces as negative space. This leaves a solid piece with holes in it that should sit on top of the keyboard but it does need some sides to allow it to stay in position. Some simple rectangles along the four sides worked for this. Make sure to measure the depth of the keyboard for these. I also chose to place another negative space in so that the keyguard would sit on the sides of the keyboard around the keys and then the keys would sit into the space before the guard around each key starts.
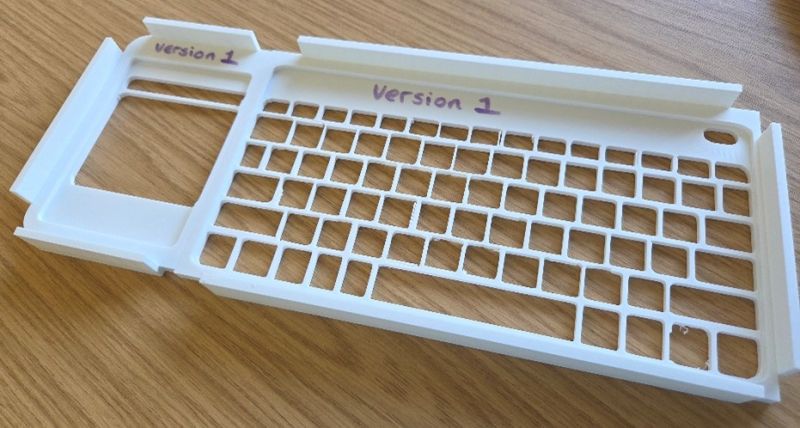
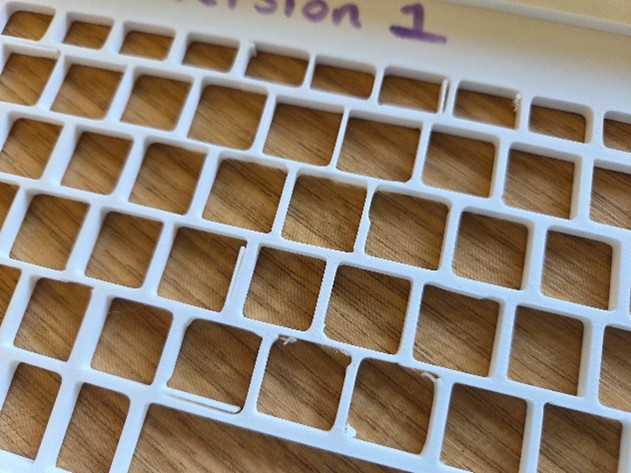
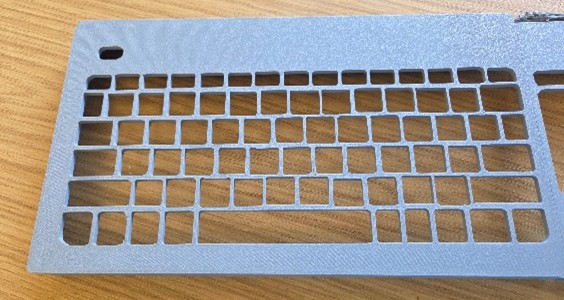
You can see here the results of this first attempt. I had managed to add the sides too far in so this didn’t fit over the keyboard. The key openings were also not smooth so would not be great for using.
This was a vital first stage. Not a failed attempt but a huge source of feedback on putting this together and a chance for me to make improvements.
Back to Bambu studio and some smoothing of the key openings came next. I also needed to move the side supports outwards slightly to allow it to fit over the keyboard. Things are starting to improve but I wasn’t happy with the way the side supports were sitting and so added rounded corner supports to the keyguard on one of the pieces.
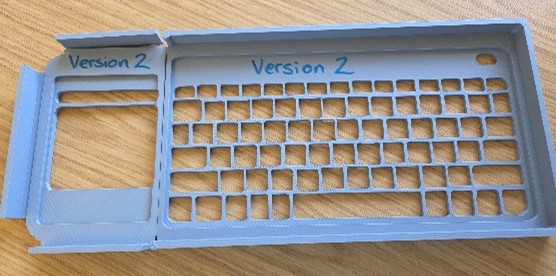
After printing I found that I had moved the sides a little too far out so they were not all fully attached.
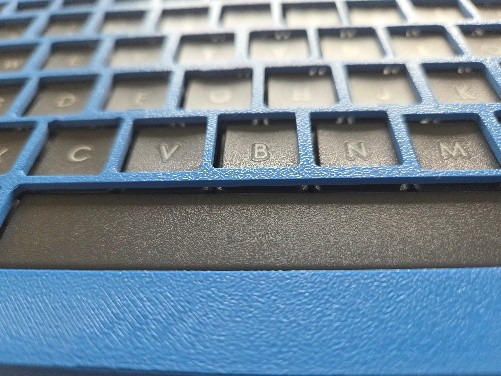
Its time now for version 3. Some further smoothing of key openings and side supports gives a better shape to the keyguard and makes it more comfortable to use.
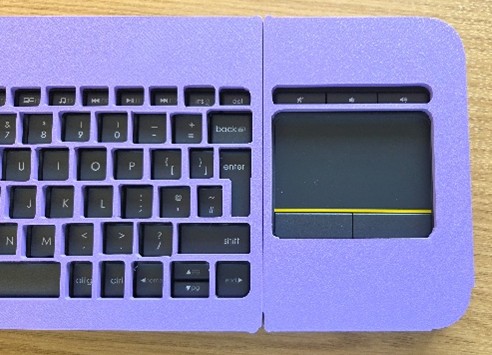
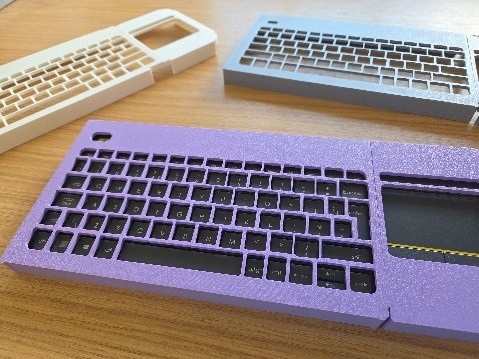
Three versions in but I now had a useable and clean looking keyguard which was ready to go out and be trialled by the learner.
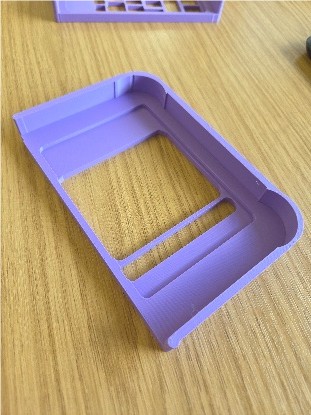
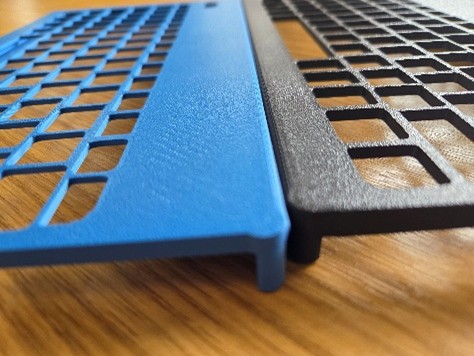
While this version of the keyguard was useable there were areas that needed to be adjusted, the front support was a little too deep pushing the front of the keyguard up and away from the keyboard so some final adjustments to this made the keyguard sit flush and give the same depth to all of the key openings, I also took this time to add curved edges to the whole keyguard to make this smoother for resting hands against during use.
One more adjustment gave me two versions of the guard, one with deeper key openings for learners who need a bit more depth and one shallower.
By the final version of this is a piece of assistive technology that has the potential to increase independence (a chance to access writing tasks with reduced support), improve typing accuracy (fewer unintended key presses, reduce fatigue (giving somewhere to rest hands whilst typing) and lead to greater confidence. This is a piece of assistive technology that can quickly become part of everyday classroom use. It’s just a case of waiting for learner feedback now.
While the 3D printing process was an important part of this work the real importance sits in the process of refinement. Getting it right for each learner is not always a straightforward process and there are a few key things to keep in mind while going through it
1. Start with the learner, not the tool
The design was shaped around the learner’s needs. Bringing together their need for a keyguard with their preference around a particular keyboard choice.
2. Use digital shortcuts to reduce workload
Using an image → SVG → Bambu Studio workflow provided an accurate starting point, reducing concerns around keyboard layout and spacing initially.
3. Prototype
The first version wasn’t perfect, and it didn’t need to be. What it needed to do was identify areas that could be refined for the user.
4. Value learner voice
Information about comfort, spacing, and usability come directly from the learner’s experience and each refinement should be informed by this.
If you are considering creating a custom keyguard:
Use an image of the actual keyboard, don’t rely on generic layouts
Keep SVG files simple to avoid import issues
Slightly increase key opening sizes beyond exact outlines for usability
Test in real classroom conditions, not just short trials
Expect multiple iterations, this is where the real improvement happens
3D printing opens up opportunities for bespoke assistive technology, but its real strength lies in enabling responsive, iterative design to produce these bespoke solutions.
Using an image to SVG process can significantly reduce setup time and improve accuracy of the final product, but it is the refinement process, grounded in real learner use, that transforms a design into an effective support.
In this case, the journey from a rough first prototype to a refined keyguard could made a meaningful difference to a learner’s access to learning.
And that is ultimately the goal, not just creating a tool that can be used but more importantly removing a barrier.
Once a month we'll send you an email with news, research and thoughts, as well as training courses and free webinars you may wish to attend.
Our social media sites - YouTube, Twitter and Facebook